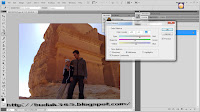
First we need a background.

pegi kat Image ~> Adjustments ~> Color Balance or press Ctrl-B to bring up the Color Balance box, adjust only Midtones settings to bring our photo a little color
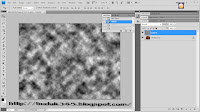
 Reset your foreground and background colors by pressing D. Create a new layer and go to Filter ~> Render ~> Clouds to create some clouds.
 pegi kat Filter ~> Render ~> Difference Clouds and repeat this effect some times
(by pressing Ctrl-F)
dan pegi kat Image ~> Adjustments ~> Brightness / Contrast dan ekot step yang d bawah.
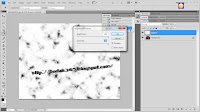
 Increase the black and white areas by going to Image ~> Adjustments ~> Levels (Ctrl-L), move the black and white points to the center
 Filter ~> Blur ~> Motion Blur and use these settings:
stkat ni dluuu...xlaratt.....
tapi kalow pakai gambar black and white,sampai step ni dah ok sbnarnye.
lebih real nampak...
lebih real nampak...

.jpg)

 copy HTML d bawah.Paste dalam HTML/JavaScript


0 Suntikkan Semangat:
Post a Comment